Nook Color Tablet Running Android OS on a MicroSD Card Prepared Using Linux
Note: Published 2016-08-31.
Summary
Conclusion: The Nook Color hardware makes a nice tablet with a really sharp screen at a reasonable price. There seems to be a catch about the version of the Nook Color that you get. Apparently some will NOT boot from the SD card. Research this before tryin it. My Nook Color has Model# BNRV200 and Software 1.2.0. More here. Apparently, you want a Nook Color with a ROM (Software) version prior to 1.4.
This is not a page of instructions on rooting the Nook Color. I do not even have all the steps here needed to run Android from a microSD card, although I will try to include all of the links I used to accomplish this. I will comment on possible causes for confusion and ambiguity for someone who is not comfortable at hacking operating systems (like me). I am comfortable using the GUI tools in Linux to format drives and executing commands in the terminal, but other users have used Windows and Mac computers to get the card ready just as easily.
What Worked ==> Stable Cyanogenmod CM7
If that is all you are interested in, you can stop reading here. Everything you need to know (if you know what you are doing) is at XDA user Evergreen’s link. I know nothing of the development at all:
Best Method for Android on Nook Color [http://forum.xda-developers.com/showthread.php?t=1000957].
If you are interested in a high-level summary of what is going on, I will try to describe it. Then I’ll make a bullet-point list of what you need to do, because the instructions, while complete, are a bit hard to follow in the paragraph form.
Overview
You need to format a micro SD card and “burn” an image to it (which does NOT mean copy and paste). Then you put a zipped file of Cyanogenmod Android code on the card and boot the Nook Color with the card in it. Magic happens… and then you have a working version of Android on your microSD card. Add the Google Apps zip file and do a recovery boot to get any Android Market Apps you want on the Nook.
SUPPLIES
- You will need a “class 4” microSD card that you can erase completely. It should be at least 2GB in size… but why not get at an 8GB card?
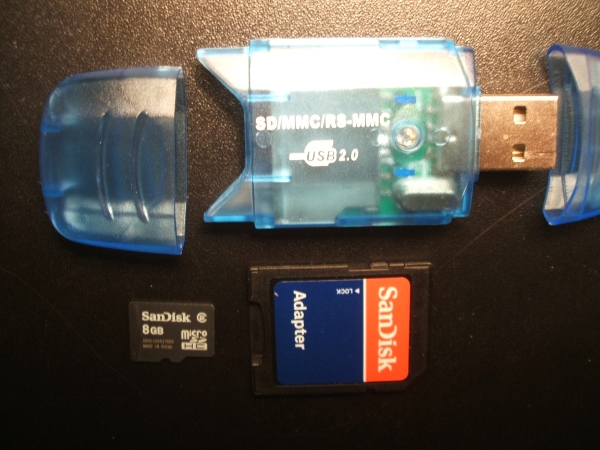
- You need a way for your computer to read the card. Some have a built-in card reader. I used an inexpensive adapter that looks like the picture at left.
- You need 3 files. The first is the generic SD loader image, available at Evergreen’s link. That is where you will also find the DETAILED instructions.
- 2nd file is the latest STABLE Cyanogenmod version of Android, which you can get here:
CM7 Zip File [http://download.cyanogenmod.com/?device=encore] - 3rd file is for Google Apps: Google Apps for Android [http://wiki.cyanogenmod.com/index.php?title=Latest_Version]. Note: I can tell you this link was a source of confusion for me at first. Right at the top of the page there is a section for “Nook Color” and files for Cyanogenmod. I do not know the details, but I can tell you that you don’t need that file. The Google apps area is way down at the bottom.
Procedure SUMMARY
Go to the Source for Real Instructions
Format the microSD card. You can use the default “Disk Utility” under Debian-based linux distributions to format the card (System.. Administration.. Disk Utility). In the end, I preferred the simplicity of gparted (can be added through Synaptic Package Manager). MOST IMPORTANT: MAKE SURE YOUR ARE WORKING ON THE microSD CARD AND NOT YOUR MAIN DRIVE! Check this in the drop-down in the upper right. You need to do things in steps. Choose “Apply Changes” after deleting a partition before you create a new one. I used the “fat32” choice to format the card. Right-click the single partition to add the “boot” flag.

Extract the size-agnostic SD loader from the compressed file. In most linux distributions, double-click the file and the GUI “Archive Manager” with show you what is in the compressed file. Highlight the single image file and click the “Extract” button.
Write the image to the SD card. Under linux, make use of the “dd” command to write a bit-for-bit image to the disk. If you are in the same directory as the image file, the text following “if=” will simply be “generic-sdcard.img”. You can get the LETTER to substitute for “X” from gparted (mine would be “b”). There should be NO NUMBER following this letter.
me@myhost$ dd if=/Path_to_Image/generic-sdcard.img of=/dev/sdX bs=1024kEject the card safely. THEN re-insert it. In a Gnome desktop, right-click the card icon and choose “Eject”. If your card reader still looks like it is active you can also use the “Safely Remove” option in the Disk Utility application.
Add the Cyanogenmod Android file to the SD card. Copy and paste the CM7 zip file to the disk. There is only one partition (called ‘boot’?). Don’t unzip the file or change its name.
Eject the card safely. THEN put it in the turned-off Nook Color.
Turn on the Nook Color. You can watch the progress, which will take a while. The tablet should then shut itself off. At this point, you should have Cyanogenmod-flavored Android on your microSD card.
Put Google Marketplace and Apps on the Card without unpacking it or renaming it. Remove the microSD card. Connect it back to your computer and and copy file #3 onto it. Remove SAFELY again.
Reboot the Nook in Recovery Mode. Power on normally. Hold power key until menu is seen. Choose “Reboot” and from next menu “Recovery”. This should make Android Marketplace and the Google Apps available.
NOTES
- Always use the “safely remove” option from your computer when removing your microSD card.
- Always add and remove the microSD card with the Nook Color POWERED OFF.
- The Nook Color has no GPS capability. Google Maps app works like their Maps section on the web, but you probably won’t be able to use the navigation feature.
- I am not an Android or other kind of developer. Do not ask me technical questions about this review. I thought running Android from the SD card was a very cool capability to have available. This page is my contribution to make it a little easier for newcomers to use. You need to follow the directions at the original source and be responsible for your own actions.
What DID NOT work
Nookie Froyo: It was easy to get a full, bootable image of this Android version and boot into it on the Nook Color. In my experience, the “soft keys” were not functional enough to use and I could not load the Android Market.
Honeycomb Version from Butterscotch.com: I thought I’d get even MORE functionality with the latest version of Android. This DID install after a following the complex procedure, which included adding the Android SDK to a Windows computer to “push” the latest files over to the Nook Color. What they *don’t* mention in the video is that you are left with a version of the Google Marketplace that lacks a ton of apps. The two we use most, The Weather Channel and TV Guide were not available at all. I do not recommend installing Honeycomb at this time (2012-02) unless you are an Android developer.